Back to: ASP.NET Core Tutorials For Beginners and Professionals
Post-Redirect-Get (PRG) Pattern Example in ASP.NET Core
In this article, I will discuss the Post-Redirect-Get (PRG) Pattern Example in the ASP.NET Core MVC Application with Examples using TempData. Please read our previous article discussing TempData in ASP.NET Core MVC Application.
What is the Post-Redirect-Get (PRG) Pattern?
When a user submits a form (e.g., to add data, update information, or perform an action), the HTTP POST method is typically used. After processing the form submission on the server (e.g., saving data to a database), if the server responds with a regular HTML page (using return View() in MVC), a refresh or reload of the resulting page can cause the browser to re-submit the form data (known as a “form resubmission problem”).
The PRG pattern addresses this issue by separating the handling of the form submission into two distinct steps:
- POST (Form Submission): When the user submits a form, it sends a POST request to the server. The server processes the form data (e.g., saves it to the database) and prepares a response.
- Redirect (PRG Step): Instead of returning a regular HTML page as the response to the POST request, the server issues an HTTP redirect (usually HTTP status code 302) to a different URL.
- GET (Response Retrieval): The browser follows the redirect and performs a GET request to retrieve the page specified by the redirect. The redirected URL corresponds to a GET request, which retrieves a regular HTML page as a response. This page often confirms the successful action, displays updated data or provides a thank-you message.
So, the Post-Redirect-Get (PRG) pattern is a commonly used design pattern in web development. It prevents duplicate form submissions and enhances the user experience by avoiding form re-submitting when users refresh the page. TempData can be used to pass information, such as success messages, between the POST and GET requests.
Post-Redirect-Get (PRG) Pattern Example in ASP.NET Core MVC
Let’s create a feedback form where users can submit comments. After submission, the user is redirected to a confirmation page, and a success message is displayed using TempData. So, create a new ASP.NET Core Application with Model-View-Controller Project template and name the project PRGPatternExample.
Create a Model
First, we need to define a simple model for the feedback. So, create a class file named Feedback.cs within your Models folder and then copy and paste the following code:
namespace PRGPatternExample.Models
{
    public class Feedback
    {
        public int Id { get; set; }
        public string Name { get; set; }
        public string Email { get; set; }
        public string Comment { get; set; }
    }
}
Create a Controller
Next, we need to Create the Feedback Controller. In the Feedback Controller, we will have three actions: one for displaying the form (Create), another for processing the form submission (CreatePOST), and the third one for displaying the confirmation message. So, Create an Empty MVC Controller named FeedbackController within the Controllers folder and then copy and paste the following code:
using Microsoft.AspNetCore.Mvc;
using PRGPatternExample.Models;

namespace PRGPatternExample.Controllers
{
    public class FeedbackController : Controller
    {
        // GET: Display the form
        [HttpGet]
        public IActionResult Create()
        {
            return View();
        }

        // POST: Process the form
        [HttpPost]
        public IActionResult CreatePOST(Feedback feedback)
        {
            if (ModelState.IsValid)
            {
                // Assume the feedback is saved to a database
                TempData["SuccessMessage"] = "Thank you for your feedback!";
                return RedirectToAction("Confirmation");
            }

            // If model state is not valid, show the form again with validation summaries
            return View(feedback);
        }

        // GET: Confirmation page
        [HttpGet]
        public IActionResult Confirmation()
        {
            return View();
        }
    }
}
Create View
This view displays a form that users can fill out to submit their feedback. The location for this view is Views/Feedback/Create.cshtml. Once you create the Create.cshtml view, copy and paste the following code:
@model PRGPatternExample.Models.Feedback

<div class="container mt-5">
    <h2>Submit Feedback</h2>
    <form asp-action="CreatePOST" asp-controller="Feedback" method="post" class="needs-validation" novalidate>
        <div class="form-group mt-1">
            <label asp-for="Name" class="control-label"></label>
            <input asp-for="Name" class="form-control" />
        </div>
        <div class="form-group mt-1">
            <label asp-for="Email" class="control-label"></label>
            <input asp-for="Email" class="form-control" />
        </div>
        <div class="form-group mt-1">
            <label asp-for="Comment" class="control-label"></label>
            <textarea asp-for="Comment" class="form-control"></textarea>
        </div>
        <div class="form-group mt-1">
            <button type="submit" class="btn btn-primary">Submit Feedback</button>
        </div>
    </form>
</div>
Confirmation View
This view displays the success message stored in TempData. The location for this view is Views/Feedback/Confirmation.cshtml. Once you create the Confirmation.cshtml View, copy, and paste the following code:
@{
    ViewData["Title"] = "Success";
}

<h1>Confirmation</h1>

@if (TempData["SuccessMessage"] != null)
{
    <div class="alert alert-success">
        @TempData["SuccessMessage"]
    </div>
}

<a asp-action="Index" asp-controller="Feedback" class="btn btn-primary">Back to Feedback Form</a>
Explanation
- Create Action (GET): Displays the feedback form to the user.
- CreatePOST Action (POST): Processes the submitted form. If the form data is valid, it saves the feedback (e.g., saving to a database or sending an email) and uses TempData to store a success message. It then redirects to the Confirmation action.
- Confirmation Action (GET): Displays a confirmation page with a success message retrieved from TempData.
Using TempData and the PRG pattern, we ensure that the user is redirected after submitting the form, which prevents duplicate submissions if the user refreshes the page. The success message is passed between the requests using TempData, providing feedback to the user.
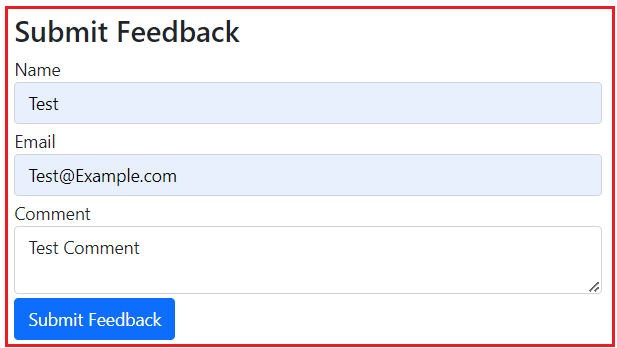
Now, run the application, and it should display the following page where you need to enter the Name, Email, and comment and click the Submit Feedback button as shown in the image below:

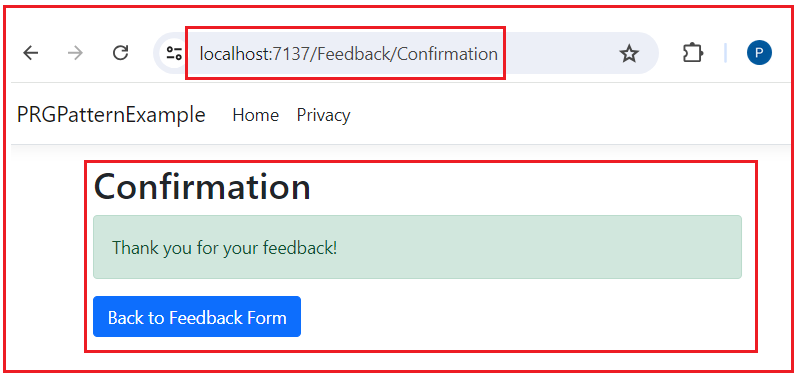
Once you click on the Submit Feedback button, it will open the following Confirmation page and display the successful message as shown in the below image:

Now, if you verify the Network tab, you will see the following: It will issue a 302 request to the CreatePost method and then redirect to the Confirmation page with a 200 status code.

Now, if you refresh the page, you will see that the page has not been submitted again.
When to Use the PRG Pattern
- Form Submissions: Use PRG for any scenario where a form submission can create or change server-side data (e.g., orders, registrations, comments).
- Multi-Step Processes: It’s useful in multi-step forms or wizards where each step might commit data changes that should not be duplicated.
In the next article, I will discuss Routing in ASP.NET Core MVC Applications with Examples. In this article, I try to explain the Post-Redirect-Get (PRG) Pattern Example in the ASP.NET Core MVC Application with examples. I hope you enjoy this Post-Redirect-Get (PRG) Pattern Example in the ASP.NET Core MVC article.

Thank you so much for this post.