Back to: ReactJS Tutorials
Outputting Conditional Content in React:
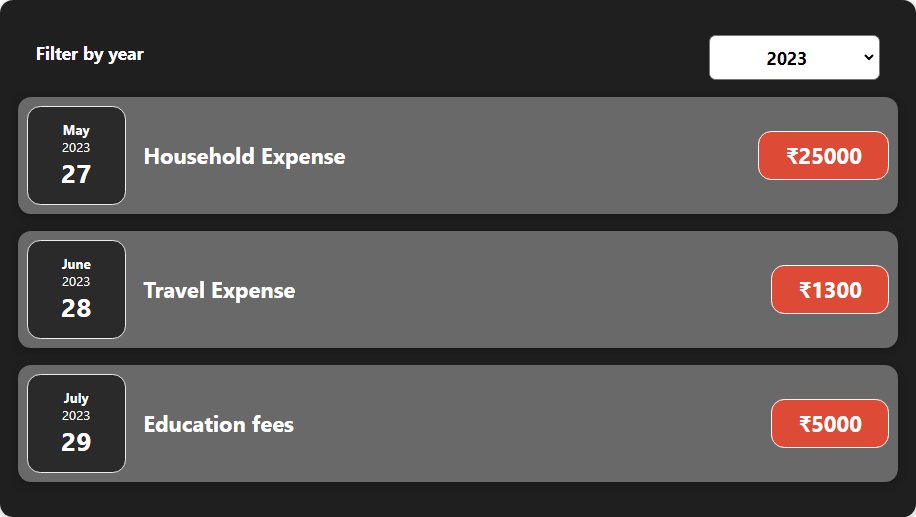
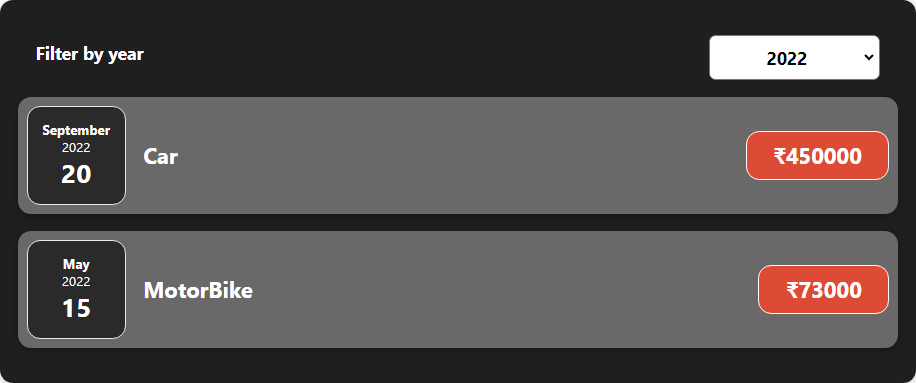
In this article, I will discuss Outputting Conditional Content in React with Examples. In the last article, we discussed the concept of keys in array items. Now, we will work on the filter in our expense tracker app. So, now our filter is working,


In the above images, you can see that we can select different years to see the expenses in that year. But we can also select the year where we have no data.

We want to show an appropriate message in such cases, and that leads us to the second part of this module, which is conditional content, which is also important.
What is Conditional Content?
Conditional content is about rendering different output under different conditions. So we’re not talking about lists but about rendering either A, B, or C, whatever you need. And that’s something we want to do here; in Expenses.js, we render our list of expense items,

but if our filteredExpenses array turns out to be empty, we’ll render nothing. We can show a message instead of rendering nothing. We can send the user a message that we have no items for the chosen filter. And for that, we have to render content conditionally.
How Can We Render Content Conditionally?
We can again add a dynamic expression just before the filteredExpenses.map expression in our JSX code and use a condition here. We’re not talking about an if condition because such long statements are not really allowed between these curly braces,

But we can use a ternary expression here.
Using a Ternary Expression:
So, we can check if our filteredExpenses.length equals zero, which means we have no items in that filteredExpenses array. And if that’s the case, after a question mark (?), which is the default JavaScript ternary expression syntax, we render a simple message in the paragraph tag where we say “no expenses found”. Otherwise, after the colon (:), we render our list. So, move the filteredExpenses.map expression that is outside the ternary expression, after the colon,

This is the default JavaScript ternary expression syntax, the format of this syntax is a condition, true part, false part. Before running the code, let’s give the paragraph tag a white color font so that the text is visible on the screen.
<p style={{color:”#ffffff”}}>
Now, let’s run the code.

So, we got a text of “no expenses found” in the year 2020, as it has no data to show or render. And if you change the year, you will see your expenses. So, that’s how we can render content conditionally.
Of course, long, ternary expressions can be a bit hard to read. So we can also fine-tune or restructure this and reuse this condition, but then we abuse a little trick in JavaScript.
&& Operator Trick to Separate Conditions:
We can add the end operator and then use the content, the JSX code that we want to render,
![]()
JavaScript works such that if you use the end operator, it will return the part after the end operator as a result of the overall check, as shown in the above image. So, if this first condition is met, it moves on to the part after the end operator and then returns that value. And that’s what we’re abusing here. Abusing sounds like a bad thing, but this is something that is fine to use. You’ll see it in a lot of React projects. It simply allows you to write shorter expressions.
We can do the same trick for our alternative. Here, we will check if the length is greater than zero,

Here, we have checked if we got more than zero items, and then we use && to output our list here. So, now, we basically split that long ternary expression into two stand-alone expressions, which check different conditions.
So, in the && trick, the part after && is rendered if the part before && returns true. And with this, we got the same behavior as before. But even that might be too much logic in the JSX code. So, we also have an alternative way of handling this.
Alternative Way to Handle Big Logical Conditions:
We can add a variable, i.e., expensesContent; the name is up to you. And we assign a default value here. The default value can be your message “No Expenses Found”.
let expensesContent = <p>No Expenses Found.</p>;
We can store JSX content in variables like the above shown. We can return it, and we can also use it anywhere where we work with values. This is absolutely fine. You are not limited to using JSX only if you return; you can also use it to create a value that is stored in a variable. Now, why are we doing that?
Because now we can edit if condition before we return. We can check if the filteredExpenses.length is greater than zero; we will have the expenses on the screen. And if that’s the case, we can overwrite expensesContent. So, I will change the value of this variable by assigning it to the whole filteredExpenses.map expression,

So, our value or list is stored in expensesContent if we get a length greater than zero. And then, in our returned JSX code, we can get rid of all that logic, and we add a simple dynamic expression where we point at expensesContent.

So, this variable holds either the message or this array expenses elements. Both are renderable, and therefore, both can be used here. And now we get a lean JSX snippet, which we return, and we’ve got our logic in the component function itself. This approach is more readable. And if you save that, it works just as before. It’s up to you which approach you prefer. It also depends on the conditions’ length and the content rendered under different cases. But ultimately, this is probably the cleanest way.
We want to show you all the options so you can go the way you like the most. We will continue with this approach in our further articles. Below is the code of all the files that have been used in this article.
Expenses.js:
import React, { useState } from "react";

import ExpenseItem from "./ExpenseItem";
import "./Expenses.css";
import Card from "../UI/Card";
import ExpensesFilter from "./ExpensesFilter";

const Expenses = (props) => {
  const [filteredYear, setFilteredYear] = useState("2023");

  const filterChangeHandler = (selectedYear) => {
    setFilteredYear(selectedYear);
  };

  const filteredExpenses = props.items.filter((expense) => {
    return expense.date.getFullYear().toString() === filteredYear;
  });

  let expensesContent = <p style={{color:"#ffffff"}}>No Expenses Found.</p>;

  if (filteredExpenses.length > 0) {
    expensesContent = filteredExpenses.map((expense) => (
      <ExpenseItem
        key={expense.id}
        title={expense.title}
        amount={expense.amount}
        date={expense.date}
      />
    ));
  }

  return (
    <div>
      <Card className="expenses">
        <ExpensesFilter
          selected={filteredYear}
          onChangeFilter={filterChangeHandler}
        />

        {expensesContent}

      </Card>
    </div>
  );
};

export default Expenses;
ExpensesFilter.js
import React from 'react';

import './ExpensesFilter.css';

const ExpensesFilter = (props) => {
  const dropdownChangeHandler = (event) => {
    props.onChangeFilter(event.target.value);
  };

  return (
    <div className='expenses-filter'>
      <div className='expenses-filter__control'>
        <label>Filter by year</label>

        <select value={props.selected} onChange={dropdownChangeHandler}>

          <option value='2023'>2023</option>
          <option value='2022'>2022</option>
          <option value='2021'>2021</option>
          <option value='2020'>2020</option>
        </select>
      </div>
    </div>
  );
};

export default ExpensesFilter;
App.js:
import React, { useState } from "react";
import Expenses from "./components/Expenses/Expenses";
import NewExpense from "./components/NewExpense/NewExpense";

const TEST_EXPENSES = [
  {
    id: "e1",
    title: "Household Expense",
    amount: 25000,
    date: new Date(2023, 4, 27)
  },
  {
    id: "e2",
    title: "Travel Expense",
    amount: 1300,
    date: new Date(2023, 5, 28)
  },
  {
    id: "e3",
    title: "Education fees",
    amount: 5000,
    date: new Date(2023, 6, 29)
  },
  {
    id: "e4",
    title: "Car",
    amount: 450000,
    date: new Date(2022, 8, 20)
  },
  {
    id: "e5",
    title: "MotorBike",
    amount: 73000,
    date: new Date(2022, 4, 15)
  },
  {
    id: "e6",
    title: "Mobile Phone",
    amount: 15000,
    date: new Date(2021, 7, 24)
  }
];

const App = () => {
  const [expenses, setExpenses] = useState(TEST_EXPENSES);

  const addExpenseHandler = (expense) => {
    setExpenses((prevExpenses) => {
      return [expense, ...prevExpenses];
    });
  };

  return (
    <div>
      <NewExpense onAddExpense={addExpenseHandler} />
      <Expenses items={expenses} />
    </div>
  );
};

export default App;
In the next article, I will discuss Adding Conditional Return Statements in React. In this article, I try to explain Outputting Conditional Content in React with Examples. I hope you enjoy this Outputting Conditional Content in React article.
