Back to: ASP.NET Core Identity Tutorials
How to Create Google OAuth Credentials?
In this article, I will discuss How to Create Google OAuth Credentials. Please read our previous article discussing External Identity Providers in ASP.NET Core Identity.
What is Google Account External Login?
Google Account External Login, in the context of web development, refers to integrating Google’s authentication services into an application. This allows users to sign in to the application using their Google Account credentials. It allows users to sign in to your application using their existing Google Account, which could be associated with services like Gmail, YouTube, or Google Drive.
What are Google OAuth Credentials?
Google OAuth credentials are part of the OAuth 2.0 authentication system, a standard for allowing secure access to user data held by a service like Google. These credentials are used to authenticate and authorize applications, websites, or services to access Google APIs on behalf of the user.
- OAuth 2.0: This is the protocol used for authorization. It allows users to share specific data with an application while keeping their usernames, passwords, and other information private.
- Credentials: In the context of Google OAuth, credentials include a client ID and a client secret. These are provided by Google when you register your application in the Google Cloud Console.
How to Create Google OAuth Credentials?
Creating Google OAuth credentials enables users to authenticate with your application using their Google accounts. This process involves registering your application in the Google Developer Console, configuring the OAuth consent screen, and generating the necessary OAuth 2.0 credentials (Client ID and Client Secret) required to authenticate users via Google. The following is a step-by-step guide to creating Google OAuth 2.0 credentials:
Create a New Project in Google Cloud Platform:
- Go to the Google Cloud Console: https://console.developers.google.com
- Sign in with your Google account if you haven’t already.
- Create a new project or select an existing one.
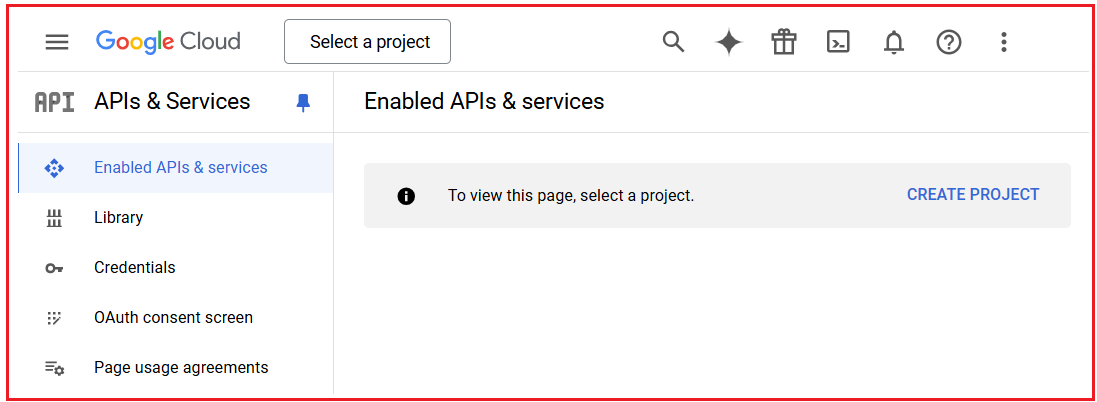
So, once you visit the URL https://console.developers.google.com, it will ask you to log in using your Google Credentials, where you need to enter the Gmail ID and password. If you have already logged in, then the dashboard will open.

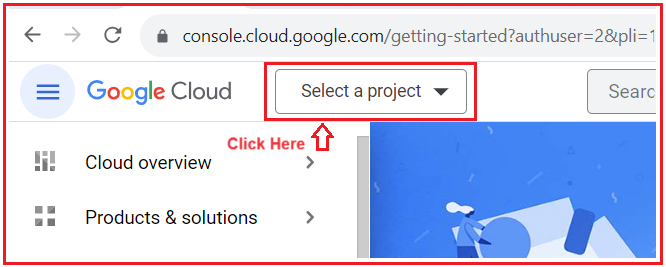
Now, to create a new project, click on the Select a Project dropdown list from the dashboard, as shown in the image below.

Once you click the Select a Project dropdown button, the following popup will open: From this popup, click on the New Project button, as shown in the image below.

Once you click on the NEW PROJECT button, it will open the below page. From this page, we need to give a meaningful name to our project (I am giving the Project name MyProject1) and then click on the Create button, as shown in the image below.

Once you click the CREATE button, creating the project will take a few seconds. Once the project is created, you will get the following Notification message.

Enable Google APIs and Services You Need:
To use OAuth 2.0, certain Google APIs must be enabled in your project. To do so, in the dashboard of your project, navigate to “API & Services” and click on the “Enabled APIs & Services” option, as shown in the image below.

Once you click on the “Enabled APIs & Services” option, the following window will open. You need to click on the “+ ENABLE APIS AND SERVICES” button, as shown in the image below, to find the Google API you need (like Google Drive API, Google Calendar, Gmail API, etc.) and enable it.

Enable Google+ API for External Authentication:
Once you click on the “+ ENABLE APIS AND SERVICES” button, the following window will open. Here, search for Google Plus API and then click Google+ API, as shown in the below image.

Once you click on the Google+ API, it will open the following Product Details Page. From this page, simply click on the ENABLE button as shown in the image below.

Once you click on the ENABLE button, it will add this product to our project and redirect to the Enabled API and Services dashboard, and you will see the Google+ API in the dashboard for our newly created project, as shown in the image below.

Configure OAuth Consent Screen:
Before creating OAuth credentials, we must configure the OAuth consent screen, which informs users about your application when they are asked to grant permissions. To do so, from the left-hand navigation menu, select “APIs & Services” > “OAuth consent screen” as shown in the below image:

It will open the following OAuth Consent Screen. Here, you need to select the External radio button and then click on the Create button, as shown in the below image.

Select User Type:
- External: Select this if your app will be used by users outside your organization (for example, by customers or users of your website).
- Internal: Choose this if your app will only be used within your organization.
Once you click on the Create button, the following window will open. Here, you need to provide the App Name, user support email, app logo, and Developer Email address. If you want, you can also provide additional optional information and then click on the SAVE AND CONTINUE button, as shown in the image below. You can also follow the same on the subsequent pages.

Here,
- App name: Enter your application’s name.
- User support email: Provide an email address where users can contact for support.
- App logo: This is your logo. It helps people recognize your app and is displayed on the OAuth consent screen.
- Authorized domains: Add the domain of your app (e.g., example.com).
- Optionally, provide Privacy Policy and Terms of Service URLs.
Create OAuth Credentials:
With the consent screen configured, you can now create the OAuth 2.0 credentials. Go to the “APIs & Services” > “Credentials” page. On the left side, you will see the Credentials menu, click on the Credentials link as shown in the image below:

Once you click on the Credentials link, the following window will open. Here, click on the Create Credentials button and then select the OAuth client ID option as shown in the below image:

On the next screen (i.e., Create OAuth Client ID)
- Select Web application as the Application type
- Provide a meaningful name for the OAuth client. Here, we provide the name MyWebClient1.
Authorized JavaScript Origins:
This is the URL where your application is running. To get this URL on your localhost, right-click on the project name in Solution Explorer in Visual Studio and select Properties. On the Debug tab, click on the open debug launch profiles UI, and you will find the app URL. You will get both https (https://localhost:7080) and http (http://localhost:5110) URLs, and you can also set both URLs by clicking on the Add URI option. Here, we are using the https URL only.
Authorized Redirect URIs:
This is the path in our application that users are redirected to after they are authenticated by Google, i.e., the call-back URL. The default path in ASP.NET Core is signin-google. So, the complete redirect URI is Application Root https://localhost:7080/signin-google. If we do not like this default path signin-google we can change it. We will discuss how to do this when we discuss integrating Google authentication into our ASP.NET Core application.
With the above settings in place, click on the Create button as shown in the below image:

Once you click on the Create button, the OAuth client ID and Secret will be created, and you will get the following message: Here, you can see the Client ID and Client Secret. You can download the credentials (in JSON format) or copy the Client ID and Client Secret from this page.

Now, you can use the downloaded JSON file or the copied credentials in your ASP.NET Core application to authenticate using OAuth 2.0, which we will discuss in our next article.
In the next article, I will discuss Integrating Google Authentication in ASP.NET Core MVC Application. In this article, I explain How to Create Google OAuth Credentials. I hope you enjoy this article, How to Create Google OAuth Credentials.
