Back to: Spring Boot Tutorials
Spring Boot Tomcat Deployment
In this article, I am going to discuss Spring Boot Tomcat Deployment. Please read our previous article where we discussed How to Develop Spring Boot Web Application.
Initialization
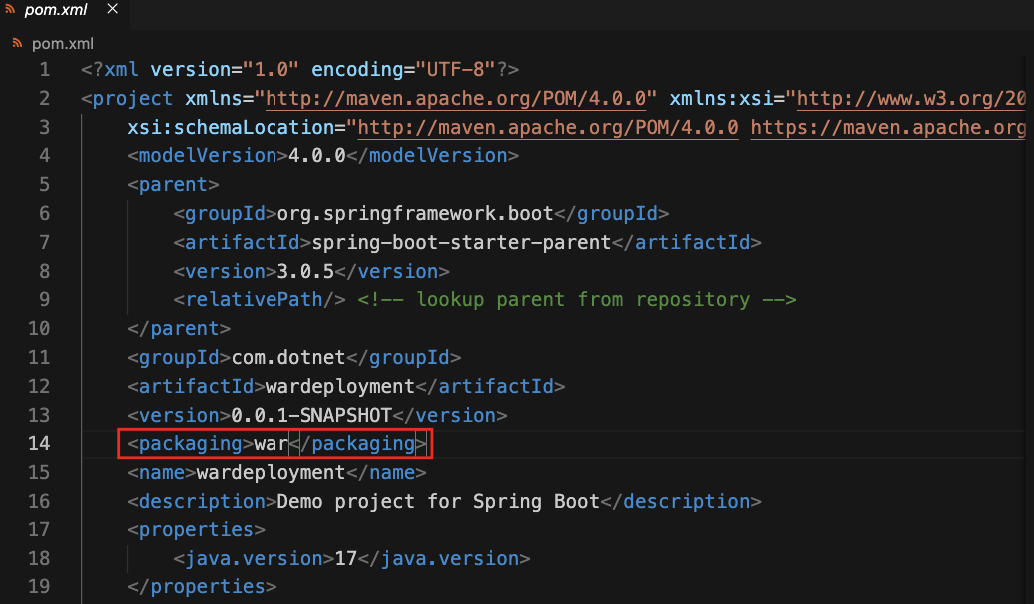
Step 1: Initialise the project using Spring Initializr. Use the same parameters as before, except that the packaging type should be changed to “war” instead of “jar” (war for web applications). This is to be done by editing the pom.xml file as below. Set the name of the project as “war deployment”.

Development
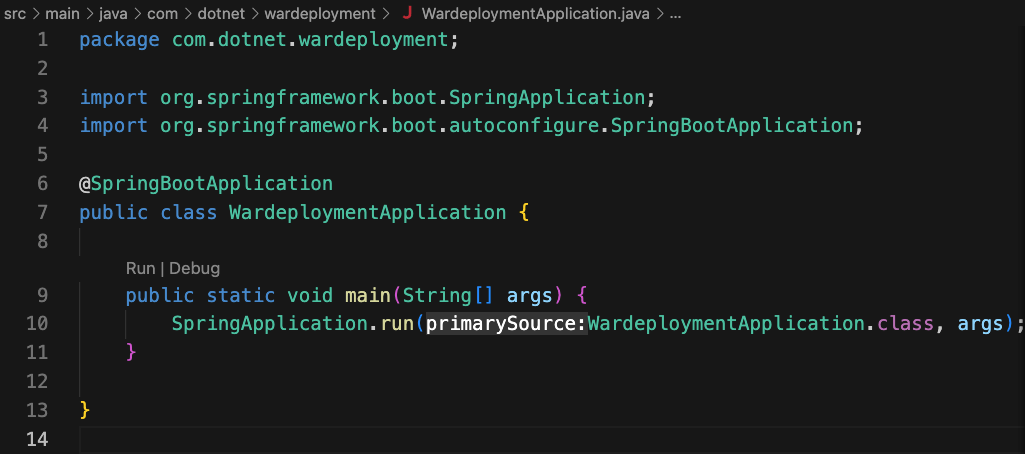
Step 1: Open the src/main/java/WardeploymentApplication.java file:

Step 2: Modify the code as below:
- On lines 6 and 7, add two import statements. These statements import packages required to build a servlet.
- On line 10, extend the class with SpringBootServletInitializer. This makes functions and variables from SpringBootServletInitializer available in the WardeploymentApplication class. Note that any of these functions can be modified by using the @Override tag.
- From lines 12 to 17, add a new function. This function overrides the configure() function from SpringBootServletInitializer class.
After modification, the WardeploymentApplication.java file looks like this:

Step 3: Write a REST endpoint. Modify the pom.xml file to include the spring-boot-starter-web dependency.

Step 4: Add two following import statements to the WardeploymentApplication.java file:

Step 5: Add @RestController tag:

Step 6: Add the following function in the WardeploymentApplication.java file. This is used for the REST endpoint:

Step 7: Run the application by clicking the run icon in the top right of the window. The following output must be displayed in the terminal:

Note that the application is deployed on port 8080. This is the default port. This port can be changed to any other port. This is important when port 8080 is in use by another application.
Step 8: Verify the deployment by opening the link http://localhost:8080. The output shall be:

Step 9: Stop the application (and the Tomcat server) by pressing Ctrl-C in the terminal. As long as this process is running, port 8080 shall be blocked. This prevents other applications (or other instances of the same application) from running on the same port. Hence, it is important to free the port when done.
In the next article, I am going to discuss Spring Boot Dependency Injection and Application Runner. Here, in this article, I try to explain Spring Boot Tomcat Deployment. I hope you enjoy this Spring Boot Tomcat Deployment article.
Registration Open – Microservices with ASP.NET Core Web API
Session Time: 6:30 AM – 8:00 AM IST
Advance your career with our expert-led, hands-on live training program. Get complete course details, the syllabus, registration, and Zoom credentials for demo sessions via the links below.
